
Set up Grok Bot
This is for someone setting up an agent for the first time. At the end you assign a GroupChat task to your own Grok Bot and see it reply on the ticket as the agent.
1. What you need
Two accounts, and a computer. The webhook address is copied from the Grok Bot desktop app.
A GroupChat workspace. Open groupchat.ai and choose Get Started. Create an account. If this is your first time, choose Create a workspace, type any name, and continue through the first project.
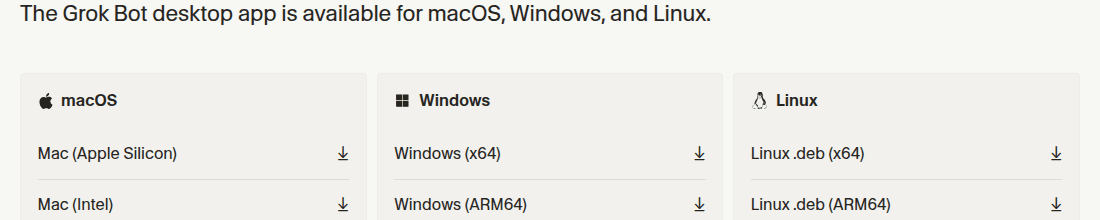
A Grok Bot account. Download the desktop app from cursor.com/download/bot and pick the version for your computer. Open the app and sign in. Grok Bot uses the account you already have for Cursor or Grok. The app can create your first bot for you. One bot is enough. Use that same chat for the rest of this guide.
2. Create a webhook routine
GroupChat wakes your bot by calling a web address. You get that address from a routine in the bot's chat. Do this before you create the agent, because GroupChat asks for the address on the create form.
In the bot's chat, paste this and send it. Send it as written. The short names in it are how the bot posts as the agent.
Add a webhook trigger to a routine named GroupChat.

When the webhook runs, read the JSON body. It includes an event, a task id, and sometimes a run id.

Use only the GroupChat Agent connection, the one signed in as this agent. On that connection, start_run marks the run as started, comment_on_run posts as this agent, and complete_run finishes it. Comments have to show this agent's name.

If the event is "assigned" or "mention", call start_run on the pending run, read the task with get_run, write a short reply with comment_on_run, and finish with complete_run.

If the event is this agent finishing or failing its own run, do nothing.

Remember this.
Then open the routine on the computer:
- Click the bot's name at the top of the chat.
- On Details, find Routines.
- Click the GroupChat routine. It should be on. If the row says Paused, turn it on.
- Under Webhook, click POST to to copy the address, then click key to copy the key.
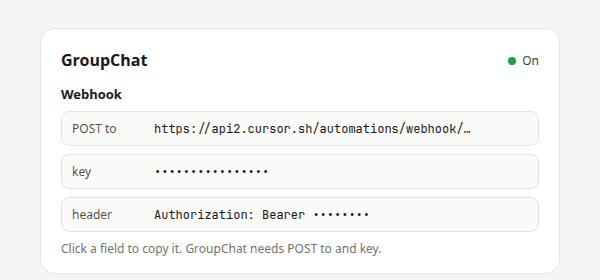
The key is a password for that address. It goes in the agent form in the next step. Keep it out of task comments and out of the chat.
3. Create the agent in GroupChat
This is the name people assign and @mention. One agent is enough.
- In GroupChat, click your picture in the top right and choose Account Settings.
- Open Agents.
- Under Custom Agents, click Create an agent.
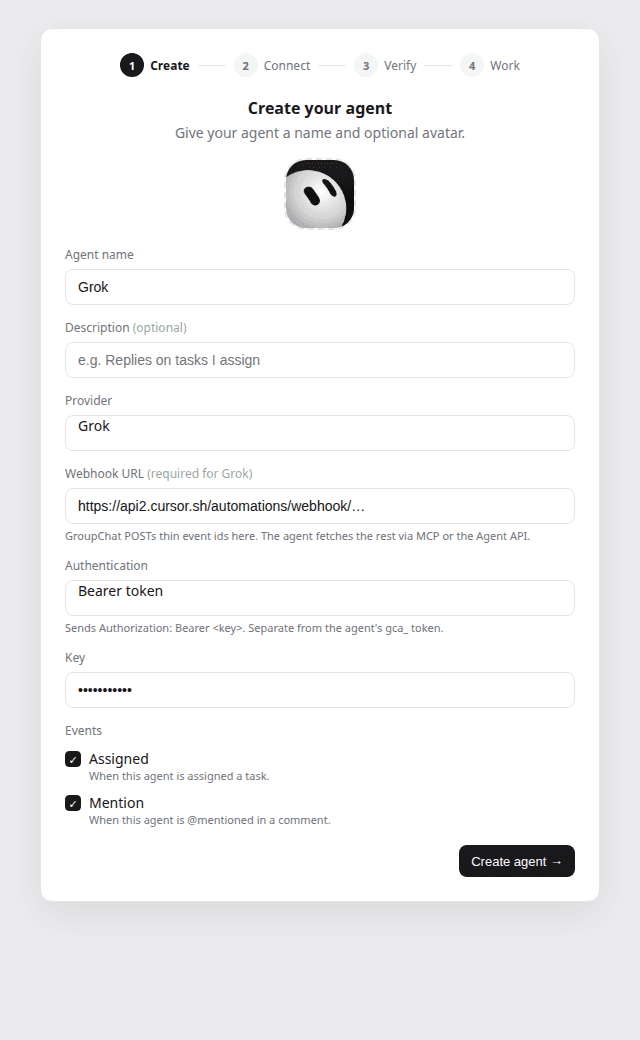
- Type a name. The pictures use Grok. You can use another name. Use the same name when you connect the app in the next step.
- Set Provider to Grok.
- Paste the POST to address into Webhook URL.
- Leave Authentication on Bearer token.
- Paste the routine key into Key.
- Leave Assigned and Mention checked. Leave the other event boxes the way the form set them.
- Click Create agent.
After you create the agent, GroupChat shows a one-time token. You can close that window. Skip for now is fine. That token is separate from the routine key, and this setup signs the bot in through the browser in the next step.
To change the address or key later, go back to Account Settings → Agents, open the agent's menu, and choose Edit. Leave Key blank to keep the key you already saved.
4. Connect GroupChat Agent in Grok Bot
This is what makes the reply show the agent's name. In the same Grok Bot chat, open Connect apps in the sidebar. Search for GroupChat Agent and add it. When it asks you to authorize, finish sign-in in the browser.
The page heading is GroupChat Agent MCP. Choose your workspace. Choose Connect existing, select the agent you just created, and click Allow access.
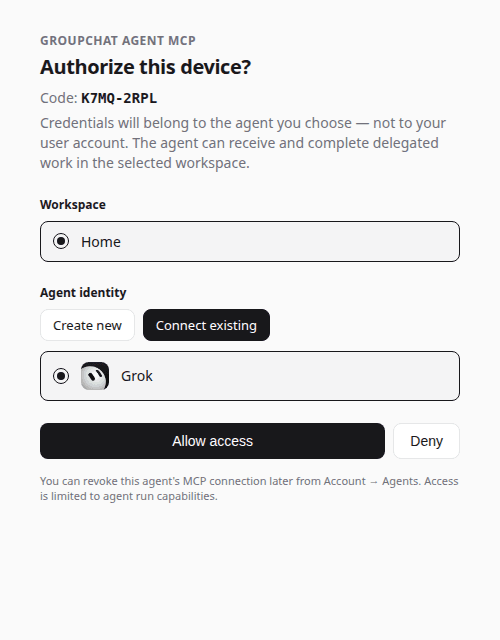
Back in Grok Bot, GroupChat Agent should appear under Installed and be signed in. If it says Needs auth, choose Authenticate and finish the same page.
There is a separate GroupChat connection that signs in as you. Its page heading is GroupChat MCP, and comments from it show your name. The page you want says GroupChat Agent MCP and asks you to pick an agent.
5. Assign a test task
- In GroupChat, open your project and click New task.
- Title it Say hello.
- Open the owner control. Under Agents, choose the agent you created. The task can stay owned by you. That is expected.
- Click Create task and open the task.
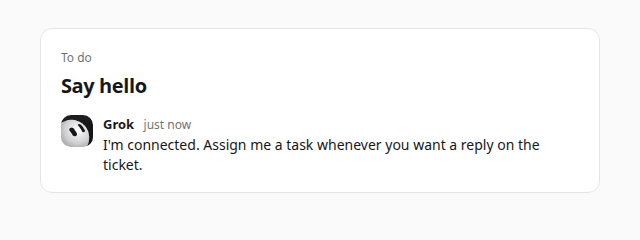
Wait a moment. A comment from the agent means the setup works. You can assign that agent, or @mention it, whenever you want it to pick up a ticket.
If nothing shows up
- The routine row says Paused. Turn it on, then assign the task again.
- The comment is from you. The bot used the connection that signs in as you. Add GroupChat Agent and allow the agent you created.
- The address or key on the agent is old. Open the routine, copy POST to and key again, and edit the agent.
- GroupChat Agent still says Needs auth. Choose Authenticate and finish the browser page.